
部署个人专属密码管理器-Bitwarden
密码管理器是什么
各类密码
顾名思义,密码管理器就是管理密码的工具。现在上网除了网银、档案等个人重要信息需要登陆输入用户名密码之外,各种网站、各类APP无不会以用户名密码验证个人身份。
密码管理
那为了方便,用一套用户名密码不就行了?
当然不行,互联网本来就是无序的地方,过段时间就能听到互联网巨头密码泄漏的新闻,只要个人密码被泄漏一次,就需要所有的网站都去修改一次。所以为了安全,最好在每个网站都是用不同的用户名,密码。
密码管理器
那怎么才能既满足复杂密码的记录,又不会忘记你的密码呢?——密码管理器应运而生,只需要记住密码管理器的密码,其他的密码保管在密码管理器中,就安全了。
所以人在互联网上漂,怎么能没有密码管理器呢?
为何要打造自己的密码管理器
密码管理器类型
密码管理器种类繁多,纷繁芜杂,参差不齐,有收费的也有免费的。
大家使用的最多的就是浏览器自动的记住密码,这类不能跨应用,也存在一些安全性的隐患。
bitwarden密码管理器
今天要介绍的是最流行,得到几乎所有用户认可的bitwarden,他有ios、android端,支持firefox、chrome、safari扩展,支持二验,支持TOTP。
个人用,完全可以使用官方的free个人版本,因为它只是缺少一些高级功能。
但是对于爱折腾的我们,拥有一套自己的密码管理器,拉上家人朋友一起使用自己部署的应用,那不是一件很美妙的事儿。
bitwarden的自主部署
bitwarden官方有自己的部署方式,见此。但是部署的方式比较复杂,启动的服务非常多,管理也比较麻烦。
所以对于轻量使用的我们,采用Vaultwarden(bitwarden_rs)项目,他可以很快速的部署Bitwarden服务,兼容 Bitwarden 官方客户端。
下面正式开始:
Bitwarden(vaultwarden)的部署
- 有一台公网ip的服务器(VPS)
- 完成域名的解析
- 完成宝塔面板的部署
- 完成Docker环境的搭建
如果上诉基础条件未完成,可参照,建立自己的网站中:
- 解析域名
- 部署宝塔面板
1. 宝塔面板中新建站点
用已经解析到服务器的域名,新建站点,几下根目录位置,确定。

2. 拉取vaultwarden镜像
ssh到服务器,然后运行镜像拉取命令
docker pull vaultwarden/server3. 实例化镜像
docker run -d --name bitwarden \
  --restart unless-stopped \
  -e WEBSOCKET_ENABLED=true \
  -v /www/wwwroot/vw.isir.com/:/data/ \    #冒号前面为第1步创建网站对应的根目录
  -p 62323:80 \   #62323可为自定义端口,功能:网页访问
  -p 62324:3012 \  #62324可为自定义端口,功能:提醒推送
  vaultwarden/server
4. 配置宝塔,并进行反代
4.1 配置网站的SSL
点击网站“设置按钮”
启用ssl,并点开强制使用按钮
4.2 配置网站反代
点击“配置文件”,如图注释掉两个 location 部分:
并在下面增加如下代码:
    location / {
        proxy_pass http://127.0.0.1:62323;
        proxy_set_header Host $host;
        proxy_set_header X-Real-IP $remote_addr;
        proxy_set_header X-Forwarded-For $proxy_add_x_forwarded_for;
        proxy_set_header X-Forwarded-Proto $scheme;
    }

    location /notifications/hub {
        proxy_pass http://127.0.0.1:62324;
        proxy_set_header Upgrade $http_upgrade;
        proxy_set_header Connection "upgrade";
    }

    location /notifications/hub/negotiate {
        proxy_pass http://127.0.0.1:62323;
    }
5.登陆网站并注册账号
5.1 登陆
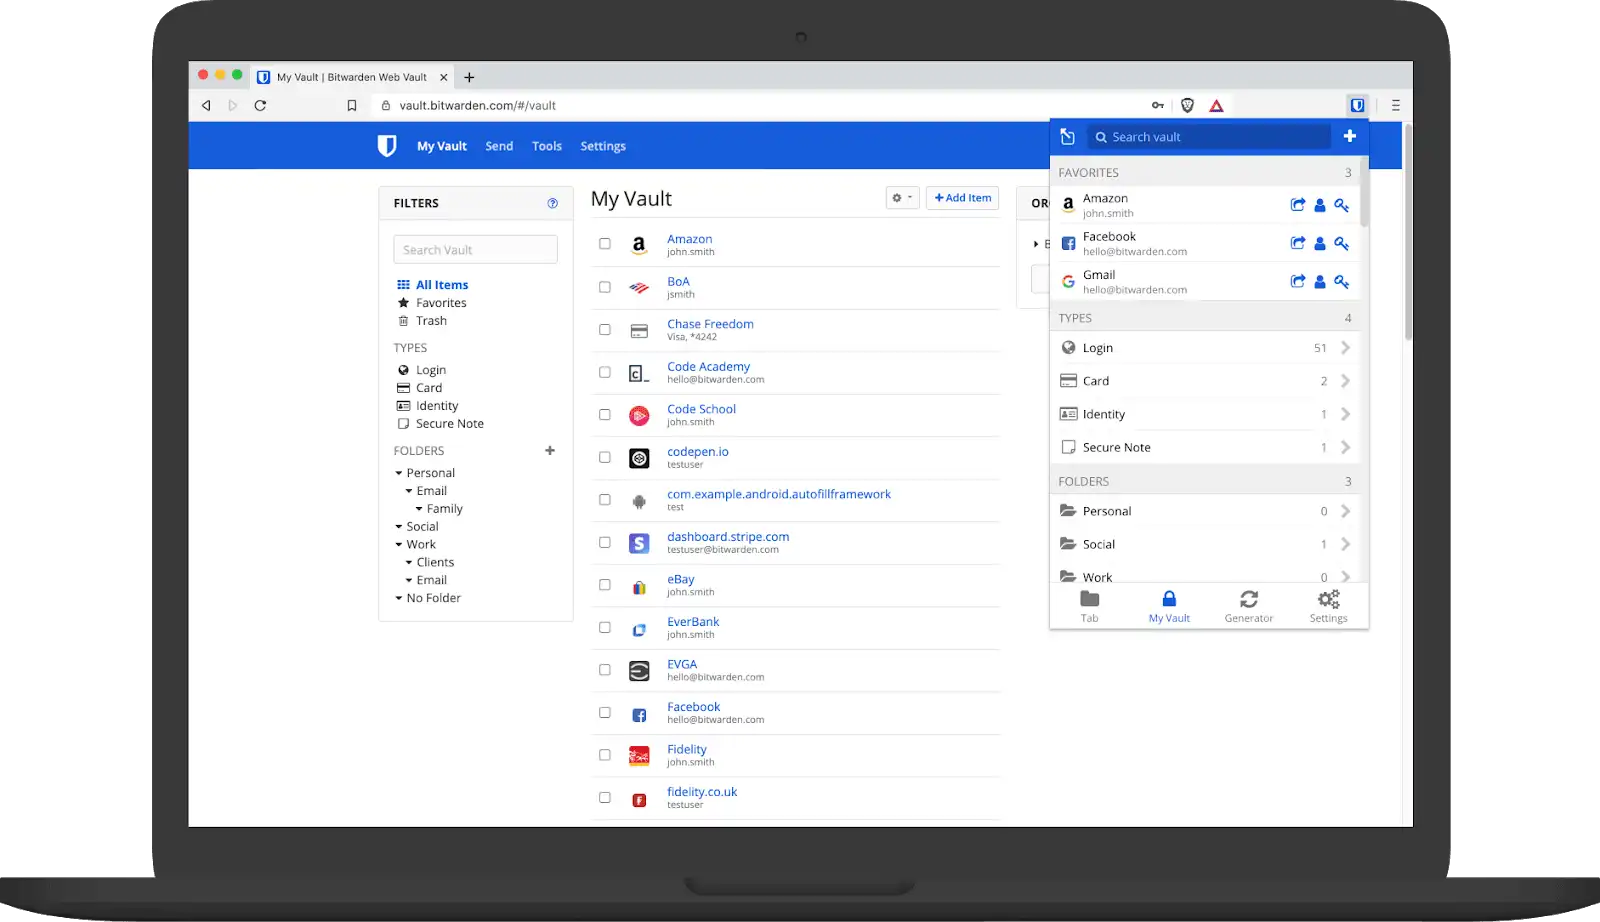
输入网址:https://vw.isir.com,打开登陆页面,点击注册按钮,注册账号
然后就可以在各个浏览器,各应用之间同步账号密码了。
5.2 客户端
支持客户端下载地址:https://bitwarden.com/download/
当然,你也可以将网址分享给自己的朋友和家人,让他们也拥有一个跨平台的优质密码管理器解决方案。
- 可以将现有浏览器、密码管理器的密码导入到bitwarden
- 网页的登陆页面未做验证,也未关闭,所有人都可注册,容易被滥用
- 未对vaultbitwarden设定备份策略
补充,可使用的环境变量参数:
## Vaultwarden Configuration File
## Uncomment any of the following lines to change the defaults
##
## Be aware that most of these settings will be overridden if they were changed
## in the admin interface. Those overrides are stored within DATA_FOLDER/config.json .
##
## By default, vaultwarden expects for this file to be named ".env" and located
## in the current working directory. If this is not the case, the environment
## variable ENV_FILE can be set to the location of this file prior to starting
## vaultwarden.

## Main data folder
# DATA_FOLDER=data

## Database URL
## When using SQLite, this is the path to the DB file, default to %DATA_FOLDER%/db.sqlite3
# DATABASE_URL=data/db.sqlite3
## When using MySQL, specify an appropriate connection URI.
## Details: https://docs.diesel.rs/diesel/mysql/struct.MysqlConnection.html
# DATABASE_URL=mysql://user:password@host[:port]/database_name
## When using PostgreSQL, specify an appropriate connection URI (recommended)
## or keyword/value connection string.
## Details:
## - https://docs.diesel.rs/diesel/pg/struct.PgConnection.html
## - https://www.postgresql.org/docs/current/libpq-connect.html#LIBPQ-CONNSTRING
# DATABASE_URL=postgresql://user:password@host[:port]/database_name

## Database max connections
## Define the size of the connection pool used for connecting to the database.
# DATABASE_MAX_CONNS=10

## Individual folders, these override %DATA_FOLDER%
# RSA_KEY_FILENAME=data/rsa_key
# ICON_CACHE_FOLDER=data/icon_cache
# ATTACHMENTS_FOLDER=data/attachments
# SENDS_FOLDER=data/sends

## Templates data folder, by default uses embedded templates
## Check source code to see the format
# TEMPLATES_FOLDER=/path/to/templates
## Automatically reload the templates for every request, slow, use only for development
# RELOAD_TEMPLATES=false

## Client IP Header, used to identify the IP of the client, defaults to "X-Real-IP"
## Set to the string "none" (without quotes), to disable any headers and just use the remote IP
# IP_HEADER=X-Real-IP

## Cache time-to-live for successfully obtained icons, in seconds (0 is "forever")
# ICON_CACHE_TTL=2592000
## Cache time-to-live for icons which weren't available, in seconds (0 is "forever")
# ICON_CACHE_NEGTTL=259200

## Web vault settings
# WEB_VAULT_FOLDER=web-vault/
# WEB_VAULT_ENABLED=true

## Enables websocket notifications
# WEBSOCKET_ENABLED=false

## Controls the WebSocket server address and port
# WEBSOCKET_ADDRESS=0.0.0.0
# WEBSOCKET_PORT=3012

## Controls whether users are allowed to create Bitwarden Sends.
## This setting applies globally to all users.
## To control this on a per-org basis instead, use the "Disable Send" org policy.
# SENDS_ALLOWED=true

## Controls whether users can enable emergency access to their accounts.
## This setting applies globally to all users.
# EMERGENCY_ACCESS_ALLOWED=true

## Job scheduler settings
##
## Job schedules use a cron-like syntax (as parsed by https://crates.io/crates/cron),
## and are always in terms of UTC time (regardless of your local time zone settings).
##
## How often (in ms) the job scheduler thread checks for jobs that need running.
## Set to 0 to globally disable scheduled jobs.
# JOB_POLL_INTERVAL_MS=30000
##
## Cron schedule of the job that checks for Sends past their deletion date.
## Defaults to hourly (5 minutes after the hour). Set blank to disable this job.
# SEND_PURGE_SCHEDULE="0 5 * * * *"
##
## Cron schedule of the job that checks for trashed items to delete permanently.
## Defaults to daily (5 minutes after midnight). Set blank to disable this job.
# TRASH_PURGE_SCHEDULE="0 5 0 * * *"
##
## Cron schedule of the job that checks for incomplete 2FA logins.
## Defaults to once every minute. Set blank to disable this job.
# INCOMPLETE_2FA_SCHEDULE="30 * * * * *"
##
## Cron schedule of the job that sends expiration reminders to emergency access grantors.
## Defaults to hourly (5 minutes after the hour). Set blank to disable this job.
# EMERGENCY_NOTIFICATION_REMINDER_SCHEDULE="0 5 * * * *"
##
## Cron schedule of the job that grants emergency access requests that have met the required wait time.
## Defaults to hourly (5 minutes after the hour). Set blank to disable this job.
# EMERGENCY_REQUEST_TIMEOUT_SCHEDULE="0 5 * * * *"

## Enable extended logging, which shows timestamps and targets in the logs
# EXTENDED_LOGGING=true

## Timestamp format used in extended logging.
## Format specifiers: https://docs.rs/chrono/latest/chrono/format/strftime
# LOG_TIMESTAMP_FORMAT="%Y-%m-%d %H:%M:%S.%3f"

## Logging to file
## It's recommended to also set 'ROCKET_CLI_COLORS=off'
# LOG_FILE=/path/to/log

## Logging to Syslog
## This requires extended logging
## It's recommended to also set 'ROCKET_CLI_COLORS=off'
# USE_SYSLOG=false

## Log level
## Change the verbosity of the log output
## Valid values are "trace", "debug", "info", "warn", "error" and "off"
## Setting it to "trace" or "debug" would also show logs for mounted
## routes and static file, websocket and alive requests
# LOG_LEVEL=Info

## Enable WAL for the DB
## Set to false to avoid enabling WAL during startup.
## Note that if the DB already has WAL enabled, you will also need to disable WAL in the DB,
## this setting only prevents vaultwarden from automatically enabling it on start.
## Please read project wiki page about this setting first before changing the value as it can
## cause performance degradation or might render the service unable to start.
# ENABLE_DB_WAL=true

## Database connection retries
## Number of times to retry the database connection during startup, with 1 second delay between each retry, set to 0 to retry indefinitely
# DB_CONNECTION_RETRIES=15

## Icon service
## The predefined icon services are: internal, bitwarden, duckduckgo, google.
## To specify a custom icon service, set a URL template with exactly one instance of `{}`,
## which is replaced with the domain. For example: `https://icon.example.com/domain/{}`.
##
## `internal` refers to Vaultwarden's built-in icon fetching implementation.
## If an external service is set, an icon request to Vaultwarden will return an HTTP
## redirect to the corresponding icon at the external service. An external service may
## be useful if your Vaultwarden instance has no external network connectivity, or if
## you are concerned that someone may probe your instance to try to detect whether icons
## for certain sites have been cached.
# ICON_SERVICE=internal

## Icon redirect code
## The HTTP status code to use for redirects to an external icon service.
## The supported codes are 301 (legacy permanent), 302 (legacy temporary), 307 (temporary), and 308 (permanent).
## Temporary redirects are useful while testing different icon services, but once a service
## has been decided on, consider using permanent redirects for cacheability. The legacy codes
## are currently better supported by the Bitwarden clients.
# ICON_REDIRECT_CODE=302

## Disable icon downloading
## Set to true to disable icon downloading in the internal icon service.
## This still serves existing icons from $ICON_CACHE_FOLDER, without generating any external
## network requests. $ICON_CACHE_TTL must also be set to 0; otherwise, the existing icons
## will be deleted eventually, but won't be downloaded again.
# DISABLE_ICON_DOWNLOAD=false

## Icon download timeout
## Configure the timeout value when downloading the favicons.
## The default is 10 seconds, but this could be to low on slower network connections
# ICON_DOWNLOAD_TIMEOUT=10

## Icon blacklist Regex
## Any domains or IPs that match this regex won't be fetched by the icon service.
## Useful to hide other servers in the local network. Check the WIKI for more details
## NOTE: Always enclose this regex withing single quotes!
# ICON_BLACKLIST_REGEX='^(192\.168\.0\.[0-9]+|192\.168\.1\.[0-9]+)$'

## Any IP which is not defined as a global IP will be blacklisted.
## Useful to secure your internal environment: See https://en.wikipedia.org/wiki/Reserved_IP_addresses for a list of IPs which it will block
# ICON_BLACKLIST_NON_GLOBAL_IPS=true

## Disable 2FA remember
## Enabling this would force the users to use a second factor to login every time.
## Note that the checkbox would still be present, but ignored.
# DISABLE_2FA_REMEMBER=false

## Maximum attempts before an email token is reset and a new email will need to be sent.
# EMAIL_ATTEMPTS_LIMIT=3

## Token expiration time
## Maximum time in seconds a token is valid. The time the user has to open email client and copy token.
# EMAIL_EXPIRATION_TIME=600

## Email token size
## Number of digits in an email 2FA token (min: 6, max: 255).
## Note that the Bitwarden clients are hardcoded to mention 6 digit codes regardless of this setting!
# EMAIL_TOKEN_SIZE=6

## Controls if new users can register
# SIGNUPS_ALLOWED=true

## Controls if new users need to verify their email address upon registration
## Note that setting this option to true prevents logins until the email address has been verified!
## The welcome email will include a verification link, and login attempts will periodically
## trigger another verification email to be sent.
# SIGNUPS_VERIFY=false

## If SIGNUPS_VERIFY is set to true, this limits how many seconds after the last time
## an email verification link has been sent another verification email will be sent
# SIGNUPS_VERIFY_RESEND_TIME=3600

## If SIGNUPS_VERIFY is set to true, this limits how many times an email verification
## email will be re-sent upon an attempted login.
# SIGNUPS_VERIFY_RESEND_LIMIT=6

## Controls if new users from a list of comma-separated domains can register
## even if SIGNUPS_ALLOWED is set to false
# SIGNUPS_DOMAINS_WHITELIST=example.com,example.net,example.org

## Controls which users can create new orgs.
## Blank or 'all' means all users can create orgs (this is the default):
# ORG_CREATION_USERS=
## 'none' means no users can create orgs:
# ORG_CREATION_USERS=none
## A comma-separated list means only those users can create orgs:
# ORG_CREATION_USERS=admin1@example.com,admin2@example.com

## Token for the admin interface, preferably use a long random string
## One option is to use 'openssl rand -base64 48'
## If not set, the admin panel is disabled
# ADMIN_TOKEN=Vy2VyYTTsKPv8W5aEOWUbB/Bt3DEKePbHmI4m9VcemUMS2rEviDowNAFqYi1xjmp

## Enable this to bypass the admin panel security. This option is only
## meant to be used with the use of a separate auth layer in front
# DISABLE_ADMIN_TOKEN=false

## Invitations org admins to invite users, even when signups are disabled
# INVITATIONS_ALLOWED=true
## Name shown in the invitation emails that don't come from a specific organization
# INVITATION_ORG_NAME=Vaultwarden

## Per-organization attachment storage limit (KB)
## Max kilobytes of attachment storage allowed per organization.
## When this limit is reached, organization members will not be allowed to upload further attachments for ciphers owned by that organization.
# ORG_ATTACHMENT_LIMIT=
## Per-user attachment storage limit (KB)
## Max kilobytes of attachment storage allowed per user.
## When this limit is reached, the user will not be allowed to upload further attachments.
# USER_ATTACHMENT_LIMIT=

## Number of days to wait before auto-deleting a trashed item.
## If unset (the default), trashed items are not auto-deleted.
## This setting applies globally, so make sure to inform all users of any changes to this setting.
# TRASH_AUTO_DELETE_DAYS=

## Number of minutes to wait before a 2FA-enabled login is considered incomplete,
## resulting in an email notification. An incomplete 2FA login is one where the correct
## master password was provided but the required 2FA step was not completed, which
## potentially indicates a master password compromise. Set to 0 to disable this check.
## This setting applies globally to all users.
# INCOMPLETE_2FA_TIME_LIMIT=3

## Controls the PBBKDF password iterations to apply on the server
## The change only applies when the password is changed
# PASSWORD_ITERATIONS=100000

## Controls whether a password hint should be shown directly in the web page if
## SMTP service is not configured. Not recommended for publicly-accessible instances
## as this provides unauthenticated access to potentially sensitive data.
# SHOW_PASSWORD_HINT=false

## Domain settings
## The domain must match the address from where you access the server
## It's recommended to configure this value, otherwise certain functionality might not work,
## like attachment downloads, email links and U2F.
## For U2F to work, the server must use HTTPS, you can use Let's Encrypt for free certs
# DOMAIN=https://bw.domain.tld:8443

## Allowed iframe ancestors (Know the risks!)
## https://developer.mozilla.org/en-US/docs/Web/HTTP/Headers/Content-Security-Policy/frame-ancestors
## Allows other domains to embed the web vault into an iframe, useful for embedding into secure intranets
## This adds the configured value to the 'Content-Security-Policy' headers 'frame-ancestors' value.
## Multiple values must be separated with a whitespace.
# ALLOWED_IFRAME_ANCESTORS=

## Number of seconds, on average, between login requests from the same IP address before rate limiting kicks in.
# LOGIN_RATELIMIT_SECONDS=60
## Allow a burst of requests of up to this size, while maintaining the average indicated by `LOGIN_RATELIMIT_SECONDS`.
## Note that this applies to both the login and the 2FA, so it's recommended to allow a burst size of at least 2.
# LOGIN_RATELIMIT_MAX_BURST=10

## Number of seconds, on average, between admin requests from the same IP address before rate limiting kicks in.
# ADMIN_RATELIMIT_SECONDS=300
## Allow a burst of requests of up to this size, while maintaining the average indicated by `ADMIN_RATELIMIT_SECONDS`.
# ADMIN_RATELIMIT_MAX_BURST=3

## Yubico (Yubikey) Settings
## Set your Client ID and Secret Key for Yubikey OTP
## You can generate it here: https://upgrade.yubico.com/getapikey/
## You can optionally specify a custom OTP server
# YUBICO_CLIENT_ID=11111
# YUBICO_SECRET_KEY=AAAAAAAAAAAAAAAAAAAAAAAA
# YUBICO_SERVER=http://yourdomain.com/wsapi/2.0/verify

## Duo Settings
## You need to configure all options to enable global Duo support, otherwise users would need to configure it themselves
## Create an account and protect an application as mentioned in this link (only the first step, not the rest):
## https://help.bitwarden.com/article/setup-two-step-login-duo/#create-a-duo-security-account
## Then set the following options, based on the values obtained from the last step:
# DUO_IKEY=<Integration Key>
# DUO_SKEY=<Secret Key>
# DUO_HOST=<API Hostname>
## After that, you should be able to follow the rest of the guide linked above,
## ignoring the fields that ask for the values that you already configured beforehand.

## Authenticator Settings
## Disable authenticator time drifted codes to be valid.
## TOTP codes of the previous and next 30 seconds will be invalid
##
## According to the RFC6238 (https://tools.ietf.org/html/rfc6238),
## we allow by default the TOTP code which was valid one step back and one in the future.
## This can however allow attackers to be a bit more lucky with there attempts because there are 3 valid codes.
## You can disable this, so that only the current TOTP Code is allowed.
## Keep in mind that when a sever drifts out of time, valid codes could be marked as invalid.
## In any case, if a code has been used it can not be used again, also codes which predates it will be invalid.
# AUTHENTICATOR_DISABLE_TIME_DRIFT=false

## Rocket specific settings
## See https://rocket.rs/v0.4/guide/configuration/ for more details.
# ROCKET_ADDRESS=0.0.0.0
# ROCKET_PORT=80  # Defaults to 80 in the Docker images, or 8000 otherwise.
# ROCKET_WORKERS=10
# ROCKET_TLS={certs="/path/to/certs.pem",key="/path/to/key.pem"}

## Mail specific settings, set SMTP_HOST and SMTP_FROM to enable the mail service.
## To make sure the email links are pointing to the correct host, set the DOMAIN variable.
## Note: if SMTP_USERNAME is specified, SMTP_PASSWORD is mandatory
# SMTP_HOST=smtp.domain.tld
# SMTP_FROM=vaultwarden@domain.tld
# SMTP_FROM_NAME=Vaultwarden
# SMTP_SECURITY=starttls # ("starttls", "force_tls", "off") Enable a secure connection. Default is "starttls" (Explicit - ports 587 or 25), "force_tls" (Implicit - port 465) or "off", no encryption (port 25)
# SMTP_PORT=587          # Ports 587 (submission) and 25 (smtp) are standard without encryption and with encryption via STARTTLS (Explicit TLS). Port 465 is outdated and used with Implicit TLS.
# SMTP_USERNAME=username
# SMTP_PASSWORD=password
# SMTP_TIMEOUT=15

## Defaults for SSL is "Plain" and "Login" and nothing for Non-SSL connections.
## Possible values: ["Plain", "Login", "Xoauth2"].
## Multiple options need to be separated by a comma ','.
# SMTP_AUTH_MECHANISM="Plain"

## Server name sent during the SMTP HELO
## By default this value should be is on the machine's hostname,
## but might need to be changed in case it trips some anti-spam filters
# HELO_NAME=

## SMTP debugging
## When set to true this will output very detailed SMTP messages.
## WARNING: This could contain sensitive information like passwords and usernames! Only enable this during troubleshooting!
# SMTP_DEBUG=false

## Accept Invalid Hostnames
## DANGEROUS: This option introduces significant vulnerabilities to man-in-the-middle attacks!
## Only use this as a last resort if you are not able to use a valid certificate.
# SMTP_ACCEPT_INVALID_HOSTNAMES=false

## Accept Invalid Certificates
## DANGEROUS: This option introduces significant vulnerabilities to man-in-the-middle attacks!
## Only use this as a last resort if you are not able to use a valid certificate.
## If the Certificate is valid but the hostname doesn't match, please use SMTP_ACCEPT_INVALID_HOSTNAMES instead.
# SMTP_ACCEPT_INVALID_CERTS=false

## Require new device emails. When a user logs in an email is required to be sent.
## If sending the email fails the login attempt will fail!!
# REQUIRE_DEVICE_EMAIL=false

## HIBP Api Key
## HaveIBeenPwned API Key, request it here: https://haveibeenpwned.com/API/Key
# HIBP_API_KEY=

# vim: syntax=ini
共有 0 条评论